What Is a Fashion Illustrator & How to Become One

The world of fashion illustration is a rewarding one. I have had the privilege to work in this special industry for many years and am currently based in Texas but collaborate with clients across the world, including New York, Los Angeles, London, Paris, and other hot cities! You can check out my blog, 8 Years In Business And 5 Tips I Have Learned From It to learn more about my experience. 

One thing I love about being a fashion illustrator is how every day is different from the next and presents new opportunities and challenges. I wrote this blog to share all the fundamentals of fashion illustration and how to join the fun!  

What Is a Fashion Illustrator and What Do They Do?

First things first: what exactly is a fashion illustrator!? 

They are many things, to be honest, but at their essence, they are an artist who takes a fashion designer's vision to life through drawings. 

Fashion illustrators work closely with their clients to make their dreams a reality. Fashion encompasses many aspects, including traditional fashion pieces such as dresses, sweaters, jeans, and t-shirts. But there is more to it! A fashion illustrator will also be drafting and helping to create socks, accessories, hats, and bags. They are involved in the innovative and varied fashion trends of each season and deliver them through a big range of art mediums including sketching, digital art, and even watercolour paint. 

A fashion illustrator is someone who loves to work with people, has a knack for drawing and expressing themselves creatively and loves clothing. When a designer wants to finalize their concept, they would work directly with a fashion illustrator who would then draw and design the concept before any prototypes of the pieces are made.

As I mentioned, it is challenging to accurately describe the day in the life of a fashion illustrator, because each day is simply different. Depending on your personal goals and skills, you may wish to focus your work on editorial illustration, fashion, beauty packaging, live sketching, and selling work. 

Your workplace will also vary! Depending on their goals, fashion illustrators can work for themselves, or be employed in a fashion house, boutique, magazine, or design studio. 

What Are the Skills Required to Become a Fashion Illustrator?

There are several critical skills required to become a fashion illustrator.

Firstly, you do not need to have a formal degree to become a fashion illustrator. If this is the route you want to take, all power to you! There are many courses you can take from art history to create art to graphic design. You can pursue an associate, bachelor's or even a master’s degree—they’ll all do! If you choose to get a degree, you get to enjoy a hands-on approach to honing your ability to draw the human body and experiment with a variety of art mediums.  

If you don’t wish to take a degree, that is perfectly fine. You should, however, hone your skills through a range of mediums including watercolour, pen and ink, pastels, charcoal, and acrylic paint and illustrating software such as Adobe Illustrator, InDesign, and 3-D. You can do this by yourself, taking creative courses or learning from other artists! 

Talking about art and practice–of course, you can continue to perfect your skills (and you should throughout your career)–one thing you cannot fake is your artistic ability. Your artistic abilities are the essence of the job and there is nothing to hide behind. You need to have a raw talent for drawing by hand and/or by computer. This needs to translate to your deep understanding of colour, texture, lines, shading and style. You will need to be able to illustrate figures, poses, faces, clothing, and accessories realistically and accurately. 

Another important skill is the ability to understand how to accurately portray a creative brief so that the work you deliver meets your client's expectations and needs. If you are not familiar, a creative brief is a short blueprint of the project which includes the client's wants, vision, and ideas with guidelines to follow, including the intended audience and goals. 

You must have a strong sense of time management and be able to consistently meet all deadlines and work well under pressure. You will also benefit from a strong marketing strategy and the ability to network yourself effectively. Networking and putting yourself out there can be nerve-wracking at first, but you will need to, to acquire potential clients–including magazine publishers, advertising agencies, fashion designers and more! You’ll have to have a savvy eye for business matters, especially if you wish to be self-employed.  

An extremely important aspect is having an impressive portfolio. Don’t overlook this step! Whatever relevant work you complete can be used as an exhibition of your work that you can share to showcase your top pieces for acquiring new contracts and clients. 

Lastly, always believe in yourself and never stop having fun! 

How to Develop Your Style as a Fashion Illustrator

Finding your style is important, as you need a niche to stand out! Your artistic style and ability are unique to yourself and yourself only.

Here are my top tips for finding your style:

  1. Never stop creating! Use different mediums, canvases, and elements to create and create as often as you possibly can. 

  2. Get inspired. Gather images and work by some of your favourite artists and fashion illustrators to admire and be inspired regularly by their accomplishments. 

  3. Create exactly what you love. Don’t worry about what you “should” be doing and just experiment with creating pieces you truly love! 

  4. Find inspiration from varied environments. Step outside your comfort zone and head out into nature, museums, buildings and more to watch the world go by and notice what inspires you.

  5. Hone your craft. A curious artist is a talented artist! Never stop being open to learning and improving. 

  6. Lean on a mentor. Reach out to others in the industry to learn from them and hone your craft. 

  7. Enjoy the happy mistakes. 

The Different Career Paths Available to Fashion Illustrators

There are multiple different paths you can select as a fashion illustrator–or be like me and mix a little bit of all into one very rewarding career! 

Some career paths include:

Editorial Illustration 

Editorial illustration is what is used in fashion houses, digital companies, and magazines. This route is not completely all about fashion. Many makeup artists, interior designers and art companies/galleries like to use illustrators. Depending on who you’re working with, the illustrations can be used for marketing, advertising, or content. 

Fashion and Beauty Packaging

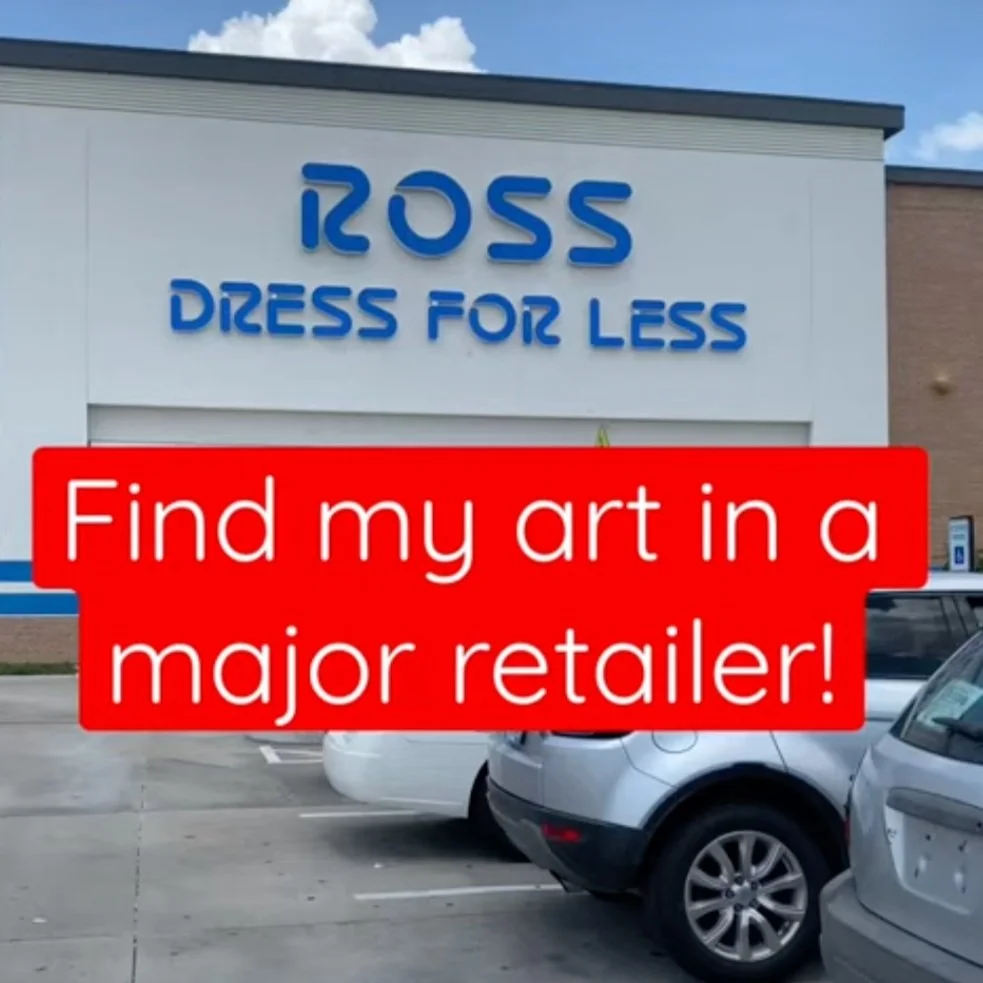
One of my favourite jobs has to be fashion and beauty packaging. There is nothing more exhilarating than walking into a storefront and seeing your work on display! As a fashion and beauty packaging illustrator, you learn everything about the product, and its customers, and support its growth and marketability by creating desirable material and packaging. Here you work on every step, from the design, colour scheme and text based on the client’s creative brief.

Live Sketching

If you wish to incorporate your skill and travel, live sketching gigs may be what you excel in. Live sketch artists attend weddings, birthday parties, launches, or any celebration! Your role is to showcase the mood of the event through your unique artwork. As a live sketch artist, you may be required to draw guests, a ceremony, clothing, or even the landscape/ backdrop.  

Market Your Work 

Many fashion illustrators sell their fabulous artwork online and/or in person at markets or shops. Your work can be put onto whatever canvas you wish including prints, stickers, cards, portraits, towels, mugs and more!  

Where to Find Work as a Fashion Illustrator

Fashion illustrators can find work in a wide range of places. Some companies do hire in-house fashion illustrator artists, as do various event planners. However, a large majority of fashion illustrators do work for themselves as freelancers. 

Being a freelancer has its perks as you are essentially your own boss! This means you can make your hours, set your rates, and work from wherever. It also, however, means you must be very self-motivated and will have to deal with the ins and outs of business ownership such as taxes and bookkeeping. It’s not impossible, but it’s important to be aware freelancing does come with its challenges. 

Tons of businesses and individuals hire freelance fashion illustrators, including:

  • Fashion designers

  • Home sewing pattern developers/companies

  • Magazines 

  • Authors

  • Art directors

  • Event planners

  • Publicists

To discover freelance fashion illustrator jobs, you will require an impressive portfolio of your work, to demonstrate to potential employers your skills and personal style. It doesn’t hurt to obtain reviews from people you worked with for an accurate portrayal of what you are like to work with. 

Marketing is critical for finding freelance fashion illustration jobs. I can’t lie to you, the fashion illustration industry is competitive, so you and your work must stand out. Create and build your brand and showcase your work to get your name out there! 

Next up is networking. You can do this by attending fashion events to meet designers, magazine editors, publicists, and other professionals in the industry. You should aim to attend fashion shows, and new boutique openings and go watch people doing speeches or talks. These are great opportunities to get your name out there and meet new people that are involved in the industry. Stand out through conversation, ask questions, and strive to forget genuine relationships. Don’t forget to bring your business cards! 

If you don’t fancy the freelance life, you can get in touch with jobs by searching online, contacting companies/designers you would like to work with or attempting to get an agent! When you apply for various roles, you will want to include your portfolio and a little about yourself. If you wish to obtain an agent, be sure you find someone who gets you and your goals. 

Tips for Building a Successful Freelance Career in Fashion Illustration

Lucky for you, I do have a few tips that I will share in this blog.

If you wish to learn more from me, check out my exclusive Fashion Illustrator Course, which grants you a lifetime access to some incredible first-hand knowledge from me! You learn how to draw fashion illustrations, elevate your career, and make money through your art. The course includes 7 video tutorials, PDF templates and resources to never stop learning! 

Tip 1: Harness the power of social media 

If you are not on social media yet, I have one question: why!? Social media is an incredible marketing tool that connects you to people around the entire world. For free! There are many social platforms and while I encourage you to master one at first, eventually you should be on all of them: from Twitter to TikTok to Instagram and Pinterest. The trick about social media is to post regularly and interact with your fans!

Tip 2: Create a structured schedule 

Make a schedule that motivates you and that you can hold yourself accountable for. This means setting up your week in advance and scheduling time for exercise, walks, self-care, and continued mastery of your art. Always block out time for lunch and breaks and try to step away from work at a very reasonable hour every day! 

Tip 3: Avoid comparison 

One of my all-time favourite quotes is: “comparison is the thief of joy” from Theodore Roosevelt. When you are starting on this career path, I advise you to stay in your lane and enjoy the process. There is only one you and only you can offer what you do! Focus on your work, believe in yourself, and strive to always grow and achieve your goals! 

Never Give Up 

Equal parts rewarding and challenging, being a fashion illustrator is the best job in the world. Okay, maybe I am a little biassed, but I truly love my job and wish anyone joining the ranks, great success. I hope this blog inspires you to get started today! 

Tedi BeznaComment
New Arrivals of Rongrong Products at 1600 Ross Stores Nationwide!

One of my biggest dreams as a fashion illustrator is to see my work in major retailers, so I’m very excited to share with you this new announcement!

You can find my art on new products in 1600 Ross: Dress for Less stores nationwide! 🤩

Being able to license my art is such an amazing way for me to share my creations in a different way, with a whole new group of people (along with my already amazing group of fans.) Through art licensing, I can share my fashion illustrations on more than just stickers and art prints! Check out the video down below to see the whole range of lifestyle products featuring Rongrong’s fashion illustrations that are now at Ross!

I am so thankful to Ross: Dress for Less stores for trusting me as a licensing artist to create art for their products! Go search your local Ross store and see what you can find!

Here’s a list of what to keep your eye out for:

  • 2 different Rongrong hairbrushes (a standard and a detangling hairbrush)

  • 2 different Rongrong magnifying mirrors (a girl boss mirror, and a time to shine mirror)

  • 3 different Rongrong compact mirrors (one featuring my iconic pug in a bathtub art, one with “the future is female” art, and one “Fryday” lipstick art)

  • a set of faux lashes


I recently went to my local Ross store here in Houston and was so nervous to see if they would have any of my products! The thing with Ross: Dress for Less is that because there is no online catalog and so many stores have different stock — you have to go out and scour through the store! It was so fun to go and search for my new arrivals, it felt like a treasure hunt! If you want to watch my trip to Ross to see what I could find, check out my mini vlog below!

If you go treasure hunting for new Rongrong products at Ross — tag me in what you find! I would love to see what you get.

You can find me at: Instagram / Facebook / Facebook Group / Youtube


Leave a comment down below, or on other social media, and tell me what products I should do art licensing for next! Also what stores would you LOVE to see Rongrong’s fashion illustrations at? I love to hear from everybody and see what you all think!


Now if you are interested in learning more about art licensing in general or how to license Rongrong’s art in particular check out my page on all of this here.

As a licensing artist, Rongrong has worked with realtors from such as Target, TJ Maxx, Marshalls, JoAnn, Michael's, Hobby Lobby, Ulta Beauty, Hallmark, Nordstrom, and more!

Product categories that are available for licensing include apparel, fashion accessories, cosmetics, stationery, calendars, greeting cards, gift, tabletops, home textiles, wall décor, luggage and more.

When you license Rongrong’s art you are supporting an Asian American small business and creator to share her message of female empowerment, self-love, and diversity with others! Find out more about the artist and her work here.


Shop my planner & stickers: shoprongrong.com

Shop my art & lifestyle products: rongrongart.com

Learn how to draw fashion illustration: rongrongdevoe.com/fashion-illustration-course

How To Draw Faces in Fashion Illustration, Step by Step

Faces: a highly dreaded subject when it comes to fashion illustration! It’s for good reason, though, because I won’t lie - it is one of the hardest and most challenging aspects for artists and fashion illustrators alike. 

Each face that you sketch is incredibly unique with certain nuances and differences. Yet, like anything else in life, with sufficient practice and dedication, you can absolutely conquer your fear of drawing faces. This blog will serve as a starting place for you to begin getting better and better!

What is Fashion Illustration? 

Fashion illustration is integral to the fashion world. A fashion illustrator is someone with great creative skills that can work closely with fashion designers to support them in making their fashion pieces come to life.

Together as a team, the fashion designer will share their concepts, including fabrics, cuts, pleats and colours for their creative looks and the illustrator will be responsible for listening closely and drawing mock-ups. Oftentimes, there will be many mock-ups necessary due to the intricacy of fashion. 

There are plenty of fashion items that a fashion illustrator can work on, including shoes, accessories, jeans, dresses, t-shirts and more. The job of a fashion illustrator is very exciting as every project, fashion house and designer is unique. 

That is not all fashion illustrators can do, however! Fashion illustrators can focus their skills on the editorial illustration space, fashion and beauty packaging, live sketching, and even selling their work online, at markets or in galleries. Depending on individual goals, fashion illustrators may wish to be self-employed, work in a fashion boutique, at a magazine, or in a design studio. 

Being a fashion illustrator invites you into the intricate fold of fashion history. Fashion illustration has been around for decades, more than 500 years, since humans began to wear beautiful intricate clothing. It’s a real honour!

What Does Drawing Faces Have to Do With Fashion Illustration?! 

You might be wondering, why does it matter if I can draw faces?! I am drawing bodies and poses!? 

Well, to give off the full fashion concept, and to properly bring the designer’s pieces to life, the silhouette needs to be finished off with complete–and accurate–faces. 

Being able to translate the looks as accurately as possible will help your skills to stand out amongst the crowd and be able to offer your clients or fans complete and finished pieces. 

People everywhere–whether they are in the industry or not–are aware of how challenging drawing faces are. It’s common knowledge. This means that if you can master it, people will be even more impressed and drawn to your work. It opens a ton of avenues! 

How to Draw Faces 

A common mistake that people make when drawing faces is not appreciating and understanding facial proportions. Facial proportion is about the relationship in size and placement between different areas of the face. For example, the spacing between lips and nose, eyes and eyebrows and their space concerning each other. 

While you probably will approach profile and other angles, let’s start with drawing a face from the front as it helps master facial proportions. 

Step 1: Draw a circle with a cross in the middle

Firstly, sketch a circle with two intersecting lines that connect right in the middle. The circle represents the top portion (ie: eyes, eyebrow, forehead) and the intersecting lines will help you determine the other facial features.

Step 2: Draw a square inside of the circle 

The next thing you will want to do is draw a square, so every corner of the square is touching the circle. Looking at your square, you can see how different sections will transform into different areas of the face. For example, the top line will be the bottom of the hairline and the bottom line is the nose area, and the centre line is your brow line.

Step 3: Sketch on the chin

Using the bottom line of the square from step two, you will want to mark a spot for the bottom of the chin. Yes, it will be outside the lines you’ve already drawn. Then, complete the jawline from each side of the square to the marked spot. Good job!

Step 4: Determine the eye location & draw them in

Finding the brow line and nose line, you can use this to help determine where the eyes should land on the face. A good rule of thumb is that the eyes are generally in line with the centre of the head. Using the brow line from step one, the eyes should be just under this line, in the centre. 

Once you determine where the eyes are located on the face, it's finally time to sketch them. While every eye will be different depending on the type of face you are drawing, it is very important, for aesthetic purposes, to be mindful of eye measurements. The width of the head, from ear to ear, generally measures the same length as five "eyes". 

Step 5: Nose time

Usually, the bottom of the nose is around the bottom line of the square drawn in step two. Naturally, the width of the nose will be different from person to person, but a general note is that the nose can be as wide as the inside corners of the eyes.

Step 6: Pucker up

Again, the mouth is a facial feature that will be different for everyone you draw. However, a good place to start is placing the mouth slightly higher than halfway between the bottom of the nose and the chin! 

Another great way to think is to lean on the eyes to help determine the width of the mouth. Consider the corners of the mouth and aim to align them with the inside edges of the eye's pupils. 

Do you wish for your model to be smiling? You go! I'll be honest, mouths are challenging to draw when grinning with teeth showing. With teeth avoid drawing dark, hard lines between every tooth as it makes them too separate and dark. Rather, the teeth at the front should be whiter, but as they go back, you can apply more shading to give them a textural, dimensional look. Note that the bottom teeth are a shade darker than the top. 

Step 7: Ears

Your face won’t be complete with the ears! You can use the brow line you drew previously to help align the ears. So, use the brow line to sketch the top of the ears and align the bottom of the ears with the nose line. Again, this doesn’t have to be perfectly exact as humans’ ears are all unique!

Step 8: Hair, please

If you are drawing for women's fashion, hair will be a fun element that you get to play around with. Even if you’re doing men's fashion you will still need to work on hair–and you can play around with length and texture. 

The hairline is found on the top edge of the square in step two! Depending on the sex of your model, the hairline may or may not be visible. 

Once the hairline is set, you can begin to add in the luscious locks. If you opt for a shorter hair moment, it will only slightly extend off the top of the head, whereas longer, or curlier hair may extend more. 

Step 9: No more floating head

We don’t want a floating head! Instead, the neck can be drawn from the bottom of the ears. Do keep in mind the women’s necks tend to be slenderer while males have broader necks than Adam apples. 

Here’s a quick recap of some tricks above: 

  • The eyes should be in the middle of the head.

  • The corners of the inside of the eyes are in a row with the sides of the nose.

  • The "mouth" line is approximately one-third under the "nose" line and the bottom of the chin.

  • The inside portions of the pupils should line up with the side corners of the lips.

Shading

Shade is a key element when drawing faces to ensure it is a realistic interpretation. Shading simply adds darkness and lightness to a face and can help translate tone. 

Typical areas to add darker shading are around the eyes, beneath the nose/bottom lip and chin. Lighter shading can be focused on the nose, cheekbones, chin, and lower lip.

The Secret Lies in Practice

Okay so maybe practice makes perfect isn’t a huge secret, but it is massively important! When you first start to master drawing faces, it can be easy to get frustrated or disheartened. This is because it is genuinely a hard part of drawing–for anyone and everyone. 

Using my tips above is a fantastic starting place because once you know how to start drawing a face with specific proportions and locations of the important facial features, you can translate this into many different people’s faces!  

It’s super important to remain positive and enjoy trying different shades, shapes and sizing when drawing various faces. This is what makes drawing portraits so exciting because there are no two faces that are exactly the same! A true artist will be able to translate portrait drawings in the original likeness of their muse or inspiration. And no face is perfect, there are always unique nuances and beauty. 

So, try not to don’t allow yourself to get too disappointed or down because if you make a mistake, there’s a chance it’s a happy mistake! If your proportions are a little odd, you may be able to fix it with a piercing, hair bangs or varied shading. 

Technical knowledge is only part of mastering drawing a face for fashion illustration. The other part to rely on is your raw talent and being confident in yourself. It really comes down to what I said earlier: you must practice plenty to get the best results! You should never stop learning. 

My Free Masterclass on How to Draw Face and Hair 

Speaking of never stop learning, have you heard of my FREE Masterclass on How to Draw Face and Hair, yet!? It’s a special course designed specifically for anyone who wishes to improve their ability to draw faces, hair and focus on details. You will also learn tons of tips and tricks from me. Some things you can look forward to in my Masterclass is:  

  • Master the basics of drawing faces and hair 

  • Develop more confidence as an artist 

  • Illustrate a variety of facial features in any ethnicity  - diversity is a pillar of my brand and I love sharing with others how to improve on accurately depicting all people

  • Master body proportions 

The master course is designed to be self-paced and it is free! You obtain lifetime access to the class so you can continue to revisit it again and again. It comes in the form of a video tutorial, for continued learning to keep practising drawing faces and facial expressions. 

Some of the clients I’ve worked with have been Chanel, Louis Vuitton, L’oreal, Nordstrom, Maybelline New York, and many more and my art and products are for sale at national retailers such as TJMaxx, Michael’s, JoAnn’s, and Hobby Lobby! I’ve dedicated my entire life to being an artist through fashion illustration and I absolutely love my job and life and am super happy to share with flourishing artists to become their best selves. 

To learn more about the course and to continue your learning of drawing faces, you can purchase my special course here

To Conclude

I sincerely hope that after reading this blog, your initial dread and fear of drawing faces has subsided. The tips and tricks that I’ve provided are an exciting starting place for any beginners to start mastering drawing profiles and portraits. Use my tips to practice and experiment with different eye shapes, eyebrow angles, nose lengths/widths, ear shapes and more. Just keep drawing and drawing–face after face! It’s a great idea to identify your common errors and keep attempting to overcome them through practice and challenging yourself. 

Happy sketching!  

Tedi BeznaComment